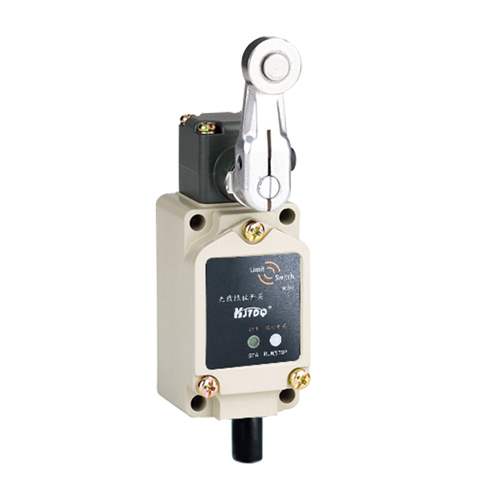
Ограничительный переключатель 3D - принтера
- time:2025-08-03 02:16:20
- Нажмите:0
Limit Switches: The Unsung Hero of Precise 3D Printing Performance
Imagine an orchestra conductor setting the tempo; every musician needs to know precisely when and where to begin. In the intricate world of 3D printing, limit switches (often called endstops) play that same critical, fundamental role. These small, often unassuming components are the silent sentinels ensuring your 3D printer knows its physical boundaries, enabling the pinpoint accuracy required to transform digital models into flawless physical objects. Ignoring their function or neglecting their health is a direct path to failed prints and endless frustration. Understanding how they work and why they matter is essential for any 3D printer owner committed to reliability.
**What Are 3D Printer Limit Switches and Why Do They Matter?**
At its core, a ограничительный переключатель is a simple electromechanical device designed to detect the presence or absence of an object within its sensing range. On a 3D printer, they are strategically positioned at the Домой or end positions of each moving axis (typically X, Y, and sometimes Z). When the printer carriage, build plate, or gantry physically contacts or triggers the switch at the end of its travel, it sends an electrical signal back to the main controller board (like Marlin, Klipper, or Repetier).
This signal tells the printer’s firmware one crucial piece of information: “You have reached the absolute limit of this axis.” This serves two primary, non-negotiable functions:
- Establishing Home Position (Homing): This is arguably the most critical function. Before any print begins, the printer must perform a homing sequence. It rapidly moves each axis towards its respective ограничительный переключатель until triggered. The moment the switch is activated, the firmware knows exactly where that axis is located (usually defined as 0 or a known reference point). All subsequent movements during the print are calculated relative to this homed position. Accurate homing is absolutely foundational for proper layer alignment, bed adhesion, and overall print geometry.
- Preventing Mechanical Over-Travel: During both homing and printing operations, the ограничительный переключатель acts as a safety gate. It prevents the motors from continuing to drive the axis movement beyond its physical constraints. Without this safeguard, moving components could collide forcefully with the printer’s frame, potentially causing stripped belts, damaged motors, bent rods, or even cracked structural parts.
The Essential Types: Mechanical vs. Optical Switches

While all limit switches serve the same purpose, the technology they use dictates their characteristics and suitability:
- Mechanical Switches:
- How they work: These contain a small physical lever, button, or plunger. When the moving part of the printer presses this lever, it physically closes (or opens) an electrical contact inside the switch, sending the signal.
- Pros: Generally the most cost-effective. Simple design, robust for basic environments. Easy to install and replace.
- Cons: Prone to physical wear over time as the lever is repeatedly pressed. Can be susceptible to false triggering or failure to trigger due to debris, dust, or accumulated grease/oil interfering with the mechanical movement. The audible “click” can be noticeable.
- Optical Switches (Opto-Endstops):
- How they work: These use an infrared LED and a phototransistor. A small physical “flag” attached to the moving axis breaks (or sometimes reflects) the infrared light beam when it reaches the end position. The interruption of the beam triggers the signal.
- Pros: No physical contact means significantly less wear, leading to potentially longer lifespan. Immune to issues caused by dust or grease interfering with a mechanical lever (though the sensor window itself can get dirty). Typically faster response time. Very quiet operation.
- Cons: Usually more expensive than mechanical switches. Requires careful alignment of the “flag” to consistently break the beam. Sensitive to ambient light interference (though most are shielded) and dust/dirt obscuring the optical window. Can be slightly more complex to mount.
The choice often comes down to budget, print environment (dusty workshop vs. cleaner desk?), and desired longevity. Many printers ship with mechanical switches, while enthusiasts often upgrade to optical for perceived reliability gains.
**Recognizing the Warning Signs of ограничительный переключатель Problems**
A malfunctioning ограничительный переключатель doesn’t always announce its failure loudly. The symptoms are often subtle but profoundly disruptive:
- Failed Homing: The printer attempts to home but doesn’t stop when it hits the end, grinding against the frame. Alternatively, it thinks it’s homed prematurely (false trigger) before actually reaching the switch.
- Inconsistent Layer Shifting: Layers suddenly shift dramatically at a specific height. This is often caused by the Z-axis limit switch misfiring during homing or a layer change, throwing off the entire vertical alignment.
- Print Drifting Off the Bed: If an X or Y switch fails to trigger accurately during homing, the print head might start its first layer off-center, causing the print to be partially or entirely off the build plate.
- False Triggering: The printer thinks it hit a switch when it hasn’t, causing unexpected stoppages or errors mid-print (e.g., “Y_MAX” error randomly).
- Axis Movement Locked: If the firmware believes a ограничительный переключатель is constantly triggered, it will often prevent movement in that direction altogether for safety, displaying an error like “Homing failed. PRINTER HALTED”.
Optimizing Performance and Preventing Headaches
Preventing ограничительный переключатель issues is far preferable to diagnosing them mid-print. Here’s how to keep them functioning optimally:
- Regular Inspection: Periodically check the physical condition. Is the lever on a mechanical switch bent or sticky? Is the optical sensor window clean? Are the mounting screws tight? Is the wiring secure?
- Cleaning: Gently clean mechanical switch levers and optical sensor windows using compressed air or a cotton swab lightly dampened with isopropyl alcohol. Avoid harsh chemicals.
- Correct Adjustment: Ensure the switch is positioned so that the printer carriage/build plate triggers it just before reaching the absolute physical endstop. You should be able to feel a small amount of springiness in the lever or see the flag cleanly break the beam. Misalignment causes unreliable triggering.
- Secure Wiring: Loose or damaged wires are a common failure point. Ensure connections at both the switch and the mainboard are snug and undamaged. Use cable ties to prevent strain. Wiggle wires gently while homing to check for intermittent faults.
- Consider the Environment: If printing in a very dusty environment, optical switches might be a better initial choice or a worthwhile upgrade. Adding protective shrouds can help mechanical switches.
- Firmware Settings: Ensure your printer’s firmware is correctly configured for the type of ограничительный переключатель installed (e.g., NO - Normally Open, or NC - Normally Closed logic). Incorrect settings can cause switches not to register or trigger constantly.
Beyond the Basics: Advanced Considerations
For the meticulous user, further tuning exists:
- Precision Homing: Some firmwares allow fine-tuning the exact trigger point relative to the nozzle over the bed (especially Z), often involving manual probe measurements. This achieves perfect first layer adhesion.
- Switch Alternatives: Magnetic proximity sensors offer another contactless option, though less common than optical. Inductive sensors work only with metal printer components.
- Dual Switches: In some high-precision or CoreXY setups, you might encounter separate switches for min and max travel on an axis, providing even tighter control.
The

![[Good news] KJT was awarded the "Technology Service Station" license by the Provincial Mechanical Engineering Society!](https://www.kjt-sensors.com/uploadfile/ueditor/image/202302/1675388443278b04.jpg "[Good news] KJT was awarded the \"Technology Service Station\" license by the Provincial Mechanical Engineering Society!")