laser sensor arduino
- time:2025-03-04 08:52:43
- Нажмите:0
Unlocking the Potential of Laser Sensors with Arduino: A Comprehensive Guide
Imagine a world where precise distance measurements, object detection, and even intricate motion tracking are at your fingertips. This is not science fiction—it’s the reality of combining laser sensors with Arduino, the versatile microcontroller platform that has revolutionized DIY electronics. Whether you’re a hobbyist, a student, or a professional, integrating laser sensors with Arduino opens up a realm of possibilities for innovative projects. In this guide, we’ll explore how to harness the power of laser sensors using Arduino, diving into their applications, setup, and key considerations.
What Are Laser Sensors and Why Use Them with Arduino?
Laser sensors are devices that use laser beams to measure distance, detect objects, or monitor movement with high accuracy. They are widely used in robotics, industrial automation, and even consumer electronics. When paired with Arduino, these sensors become accessible to a broader audience, enabling users to create projects that were once the domain of specialized engineers.
Arduino’s simplicity and flexibility make it an ideal platform for interfacing with laser sensors. With its open-source ecosystem, extensive libraries, and community support, Arduino allows even beginners to experiment with advanced technologies like laser sensing.
Key Applications of Laser Sensors with Arduino
- Distance Measurement: Laser sensors can accurately measure distances, making them perfect for applications like robotic navigation or parking assistance systems.
- Object Detection: Detect objects in real-time, useful for security systems or industrial sorting machines.
- Motion Tracking: Track the movement of objects or people, ideal for gesture-controlled devices or interactive installations.
- Precision Alignment: Ensure precise alignment in manufacturing or assembly processes.
By leveraging these applications, you can create projects that are both functional and innovative.
Choosing the Right Laser Sensor for Arduino
Not all laser sensors are created equal, and selecting the right one depends on your project’s requirements. Here are some factors to consider:

- Range: Determine the maximum distance you need to measure. Some sensors are designed for short-range applications, while others can measure distances of several meters.
- Точность: High-precision projects require sensors with fine accuracy.
- Тип экспорта: Some sensors provide analog output, while others use digital communication protocols like I2C or SPI.
- Power Consumption: Ensure the sensor’s power requirements are compatible with your Arduino board.
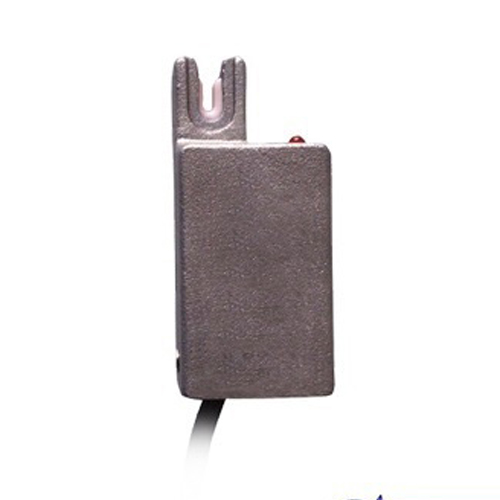
Popular laser sensors for Arduino include the VL53L0X Time-of-Flight (ToF) sensor, TCRT5000 reflective optical sensor, and Sharp GP2Y0A21YK0F distance sensor. Each of these sensors has unique features that cater to different use cases.
How to Interface a Laser Sensor with Arduino
Connecting a laser sensor to Arduino is straightforward, thanks to the platform’s user-friendly design. Here’s a step-by-step guide:
- Gather Components: You’ll need an Arduino board (e.g., Arduino Uno), a laser sensor, jumper wires, and a breadboard.
- Wire the Sensor: Connect the sensor’s power, ground, and signal pins to the corresponding pins on the Arduino. Refer to the sensor’s datasheet for specific wiring instructions.
- Install Libraries: Many laser sensors come with Arduino libraries that simplify coding. Use the Arduino IDE to install the necessary library for your sensor.
- Write the Code: Use the library’s functions to read data from the sensor. For example, if you’re using the VL53L0X sensor, you can use the
VL53L0X library to obtain distance measurements.
- Upload and Test: Upload the code to your Arduino and test the sensor’s functionality.
Here’s a simple example using the VL53L0X sensor:
# Включая# Включая
VL53L0X sensor;
void setup() {
Serial.begin(9600);
sensor.init();
sensor.setTimeout(500);
}
void loop() {
int distance = sensor.readRangeSingleMillimeters();
Serial.print("Distance: ");
Serial.print(distance);
Serial.println(" mm");
delay(100);
}
This code reads the distance measured by the sensor and prints it to the serial monitor.
Tips for Optimizing Your Laser Sensor Projects
- Calibration: Always calibrate your sensor to ensure accurate readings. Environmental factors like temperature and lighting can affect performance.
- Filtering: Implement software filters to smooth out noisy data. Techniques like moving averages can improve reliability.
- Power Management: Use appropriate power sources and consider adding capacitors to stabilize the sensor’s power supply.
- Монтаж: Securely mount the sensor to minimize vibrations or misalignment, which can impact accuracy.
Advanced Techniques and Future Trends
As technology evolves, so do the possibilities for laser sensors and Arduino. Here are some advanced techniques and trends to watch:
- Multi-Sensor Fusion: Combine data from multiple sensors (e.g., laser, ultrasonic, and infrared) for enhanced accuracy and robustness.
- Machine Learning: Integrate machine learning algorithms to analyze sensor data and enable smarter decision-making.
- IoT Integration: Connect your Arduino project to the internet for remote monitoring and control.
- Miniaturization: As sensors become smaller and more efficient, they can be used in portable or wearable devices.
By staying informed about these trends, you can push the boundaries of what’s possible with laser sensors and Arduino.
Common Challenges and How to Overcome Them
While working with laser sensors and Arduino, you may encounter challenges such as:
- Sensor Interference: Laser sensors can be affected by ambient light or reflective surfaces. Use shielding or filtering techniques to mitigate this issue.
- Limited Range: If your sensor’s range is insufficient, consider upgrading to a more powerful model or combining multiple sensors.
- Complex Wiring: For projects involving multiple sensors, use a breadboard or PCB to organize connections neatly.
With patience and experimentation, these challenges can be overcome, paving the way for successful projects.
Inspiring Project Ideas to Get You Started
Ready to put your knowledge into practice? Here are some inspiring project ideas:
- Laser Tape Measure: Create a portable device that measures distances with laser precision.
- Obstacle-Avoiding Robot: Build a robot that uses laser sensors to navigate around obstacles.
- Smart Doorbell: Design a doorbell that detects when someone is approaching and sends a notification to your phone.
- Gesture-Controlled Light Switch: Use laser sensors to detect hand gestures and control lights or appliances.
These projects not only showcase the capabilities of laser sensors and Arduino but also provide valuable hands-on experience.
With this guide, you’re now equipped to explore the exciting world of laser sensors and Arduino. Whether you’re measuring distances, detecting objects, or tracking motion, the combination of these technologies offers endless opportunities for creativity and innovation. So, grab your components, fire up your Arduino IDE, and start building something extraordinary!